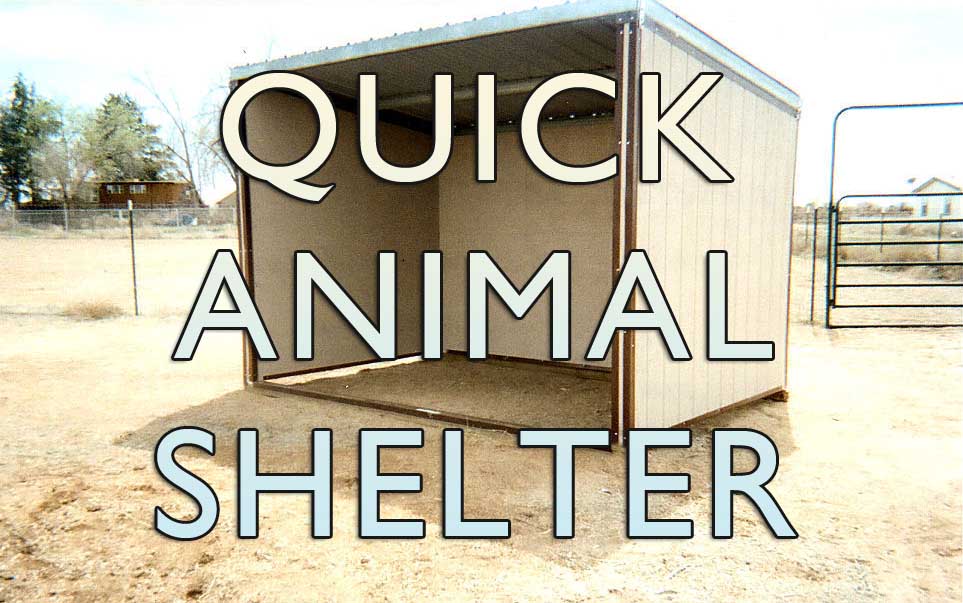
How to build a quick animal shelter
In Central Oregon, it’s getting more and more common that people are growing their own food and acquiring animals for the same. Animal shelters are extremely helpful for all types of animals and if you have a farm, chances are you have built one before. But if you are new at this, here is a simple guide to help you build one on your own if you have a limited budget and/or the materials at hand.
You will need 2×4’s and plywood. You do not need to worry about building a floor as the animals can sleep on the ground itself (hay or straw). This is just a simple, cheap and affordable animal shelter that we are talking about. Measure and cut the 2×4’s and nail them into a square for your base. This is where the entire structure will be resting on. Don’t overthink this.
After you are satisfied with the base and you made it sturdy (L brackets and nails work great), we need to build another one which is an exact copy which will be our roof. Once you have two sets of square and sturdy bases, set one to the side and now focus your time on building the wall supports for your square base.
There are several ways you can build the wall skeleton. You can use 2×4’s in each corner or you can use more by adding 3 (one in the middle of the side structure). How big the structure depends on how much support you will need. Since you are building an animal shelter in Central Oregon, you may want to make this as sturdy as possible with snow and wind factored in. Make sure you nail or screw the walls on the inside of the base. We will tell you why later.
Calculating the distance between the 2×4 walls is important so that it maintains integrity. Keep in mind that you are building a shelter to keep your animals out of the elements. The less time and love you put into the building of this animal shelter, the more weak it could be and disaster could happen if you truly do not know what you are doing.
If by now you think that perhaps a professional should come in, please contact us and we will give you an affordable estimate. Animal shelters are easy for us to do and take very little time and money. However, if you are determined to do it yourself, let’s continue with the project.
Now that your walls are up, this is where you will need help lifting up the square roof (exact copy of the bottom) and nailing it to the top. In this example, we are making a flat and leveled roof. It would be best if you made the front of the animal shelter tall and the back short. This way rain or snow can slide down the roof and off the shelter to avoid any puddles or element damage in the future.
If you do decide to create a slightly vertical roof, you will need to get creative. In example, if you nailed the walls on the “inside” of the shed, you can easily move the back end of the roof up or down to wherever you feel would be the best to nail or screw it on. However, if the walls are on the outside, it will take a little more effort in which you may need to do some cutting to fit the roof on correctly. At this point, you may be kicking yourself for building the walls on the outside of the structure.
After you have figured out the roof and have it successfully nailed or screwed on, what you should be looking at is a skeleton of your future animal shelter. Now, the hard part is done. All that is needed now is placing the plywood on the sides and the roof. Some people are good at measuring to save themselves from wasting materials. This is where you need to put some thought into how many pieces of plywood you will need.
Start with the roof. Nail or screw the plywood on. If you have built the walls and roof with 3 beams on each square, you will find placing the plywood on a bit easier. Apply and cut as needed. After you have finished your roof, go ahead and finish the siding. And that’s it! Now, you have many choices on what you can do for the roof and paint. Shingles are best but you can get as creative as you want.


Recent Comments